
KropBot is a little multiplayer robot you can control over the internet. Co-operate with random internet strangers to drive around in circles and into walls.
If it is online, you can drive the KropBot yourself!
| Requirements | |||
|---|---|---|---|
| Raspberry Pi Zero W | amazon | ||
| Pi Zero Camera | amazon | ||
| Pi Zero Camera Cable Watch out, this is different to the normal Pi one, with one small end. | amazon | ||
| MotorHAT | amazon | ||
| Either: 2-wheel drive Robot Chassis Requires some hacking, to fit the a battery. | amazon | ||
| Or: 4-wheel drive Robot Chassis If you want to go off road avoid any bases with 2-wheels and a bumper/trolley wheel. | amazon | ||
| 4x AA (or bigger, check motor specifications) battery pack to power motors. | |||
| Li-Ion battery pack for Pi Zero | amazon | ||
| Short lengths of wire To extend the short wires in the base | |||
| Soldering iron For extending wires and soldering switches. | amazon | ||
| Heat-shrink tubing To cover soldered wire joints. | |||
| Card, bluetack and tape For holding the camera in place, any alternatives are fine. | |||
Build
If you already have a working 2-motor robot platform you can skip straight to the code. The code shown below will work with any Raspberry Pi with WiFi (Zero W recommended) and MotorHAT.
Chassis v1
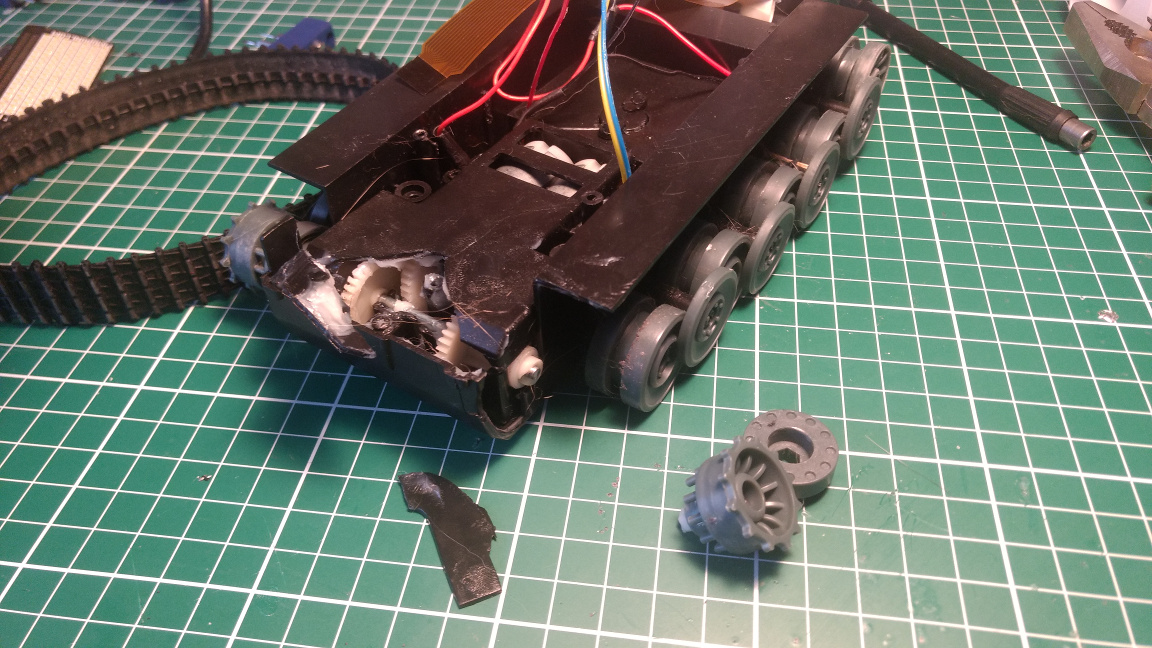
KropBot v1 was mercilessly driven down a flight of stairs. He is no more, he is kaput. He is an ex-robot. See v2 below for the new chassis.
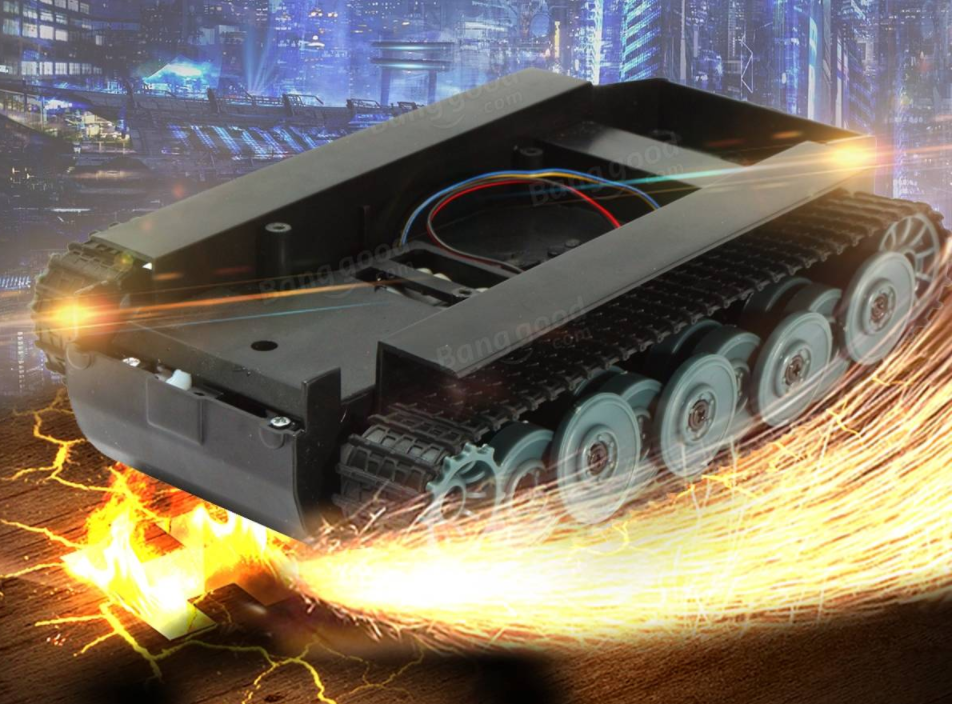
The chassis I used came pre-constructed, with motors in place and seems to be the deconstructed base of a toy tank. The sales photo slightly oversells its capabilities.
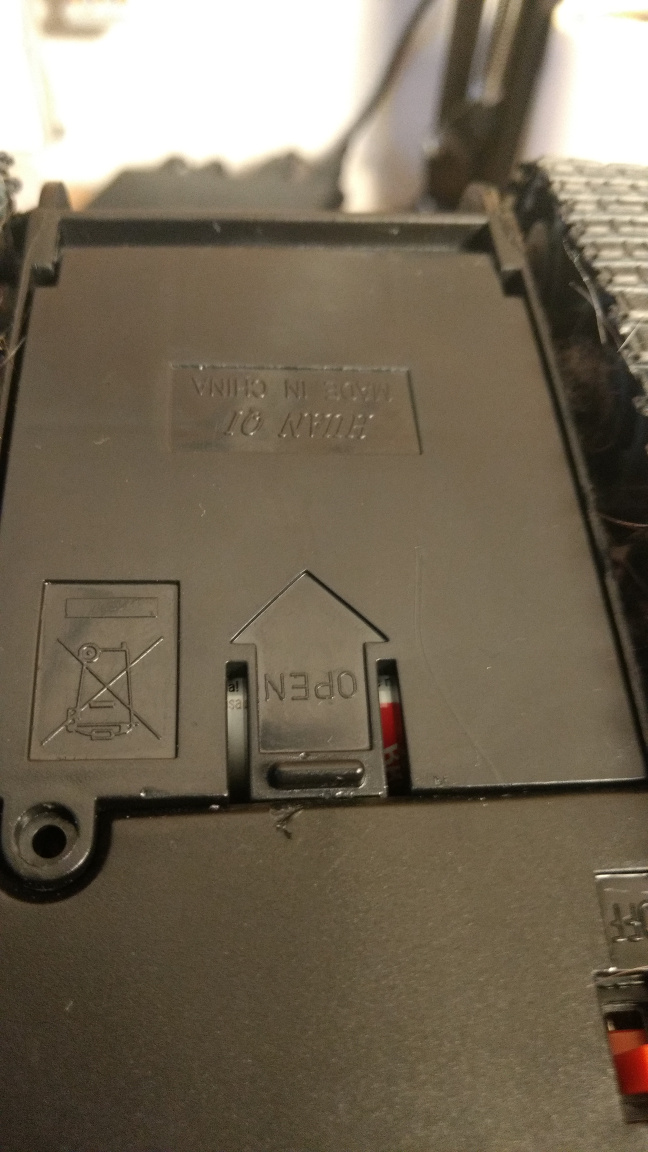
There was no AA battery holder included, just a space behind a flap labelled 4.8V. The space measured the size of 4xAA batteries (giving 6V total) but the 4xAA battery holder I ordered didn't fit. However, a 6xAA battery pack I had could be cut down to size by lopping off 2 holders and rewiring. Save yourself the hassle and get a chassis with a battery holder or see v2.
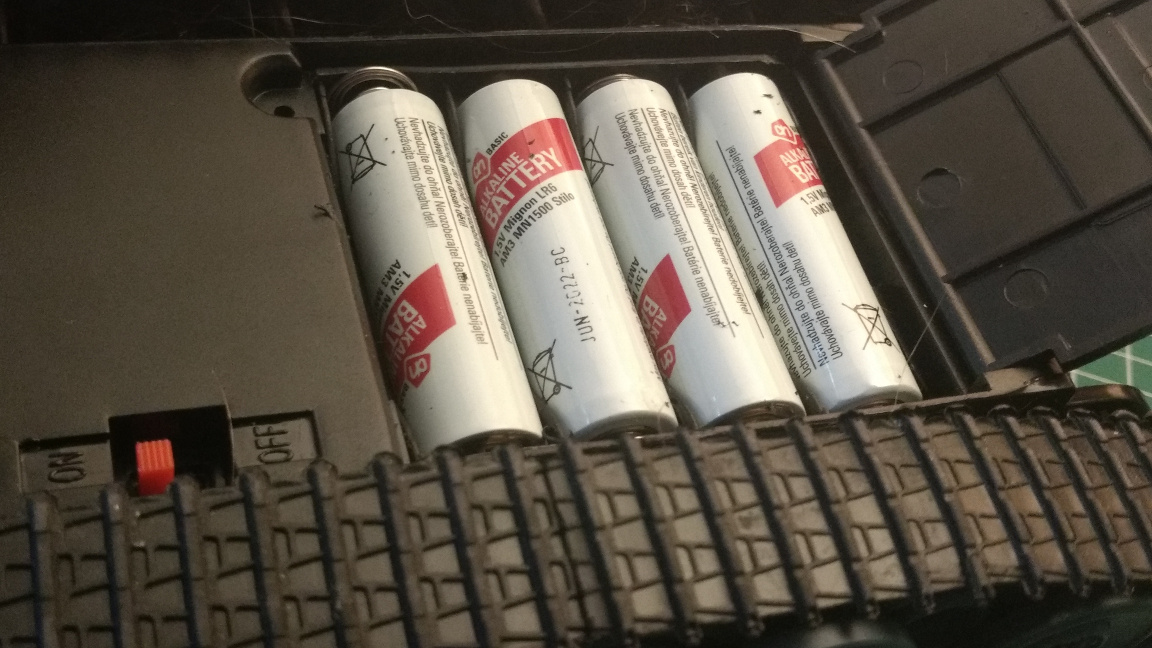
The pack is still a bit too deep, but the door can be closed with a screwdriver to wedge it shut.
An ON/OFF switch is provided in the bottom of the case which I wanted to be able to use to switch off the motor power (to save battery life, when the Pi wasn’t running). The power leads were fed through to the upper side, but were too short to reach the switch, so these were first extended before being soldered to the switch.

RIP Kropbot v1
On 15th August 2017 at approximately 13.05 EST KropBot was driven down a flight of stairs by a kind internet stranger. He is no more.
Chassis v2
Following the untimely death of v1, I rebuilt Kropbot using another chassis. This is a standard base kit for Pi/Arduino robotics, which used 4 drive motors with 4 independent wheels. To support this the code was updated to support a 4WD mode.
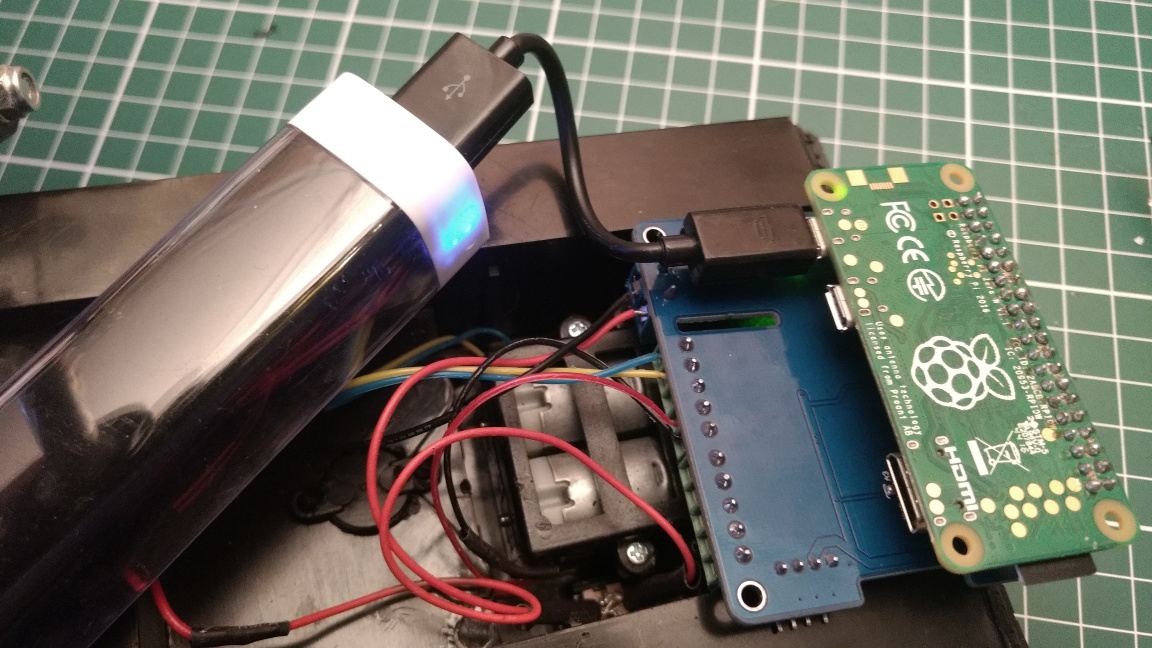
MotorHAT
The MotorHAT (here using a cheap knock-off) is a extension board for controlling 4 motors (or stepper motors) from a Pi, with speed and direction control. This is a shortcut, but you could also use L293D motor drivers together with PWM on the GPIO pins for speed control.
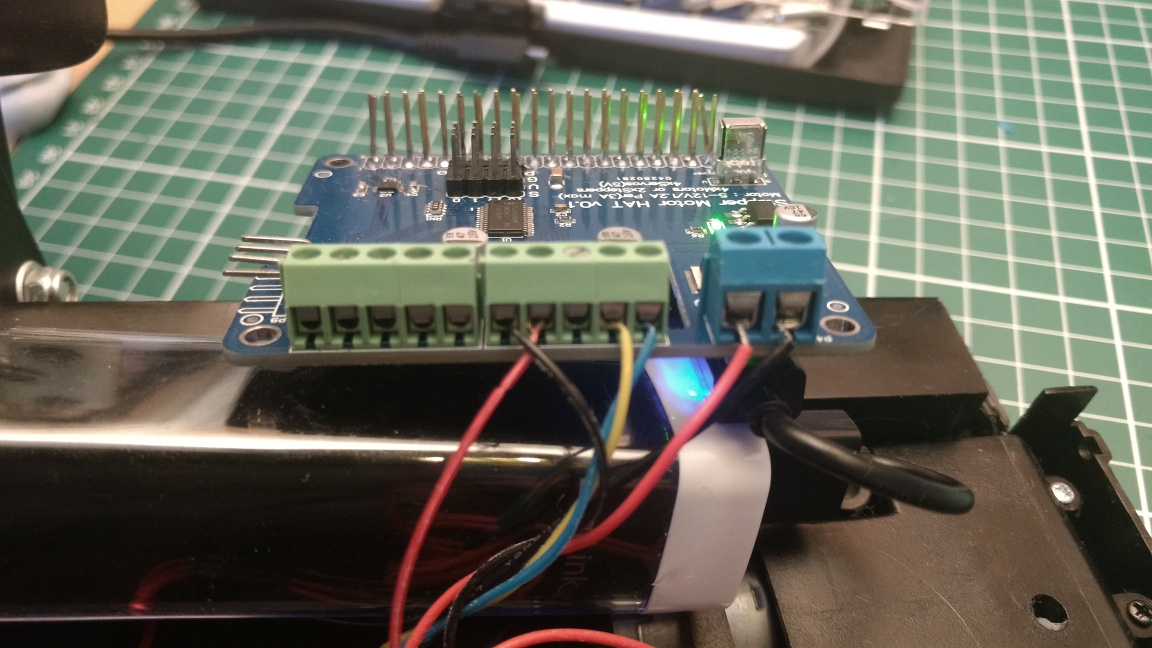
Once wired into the power supply (AA batteries) the MotorHAT power LED should light up.
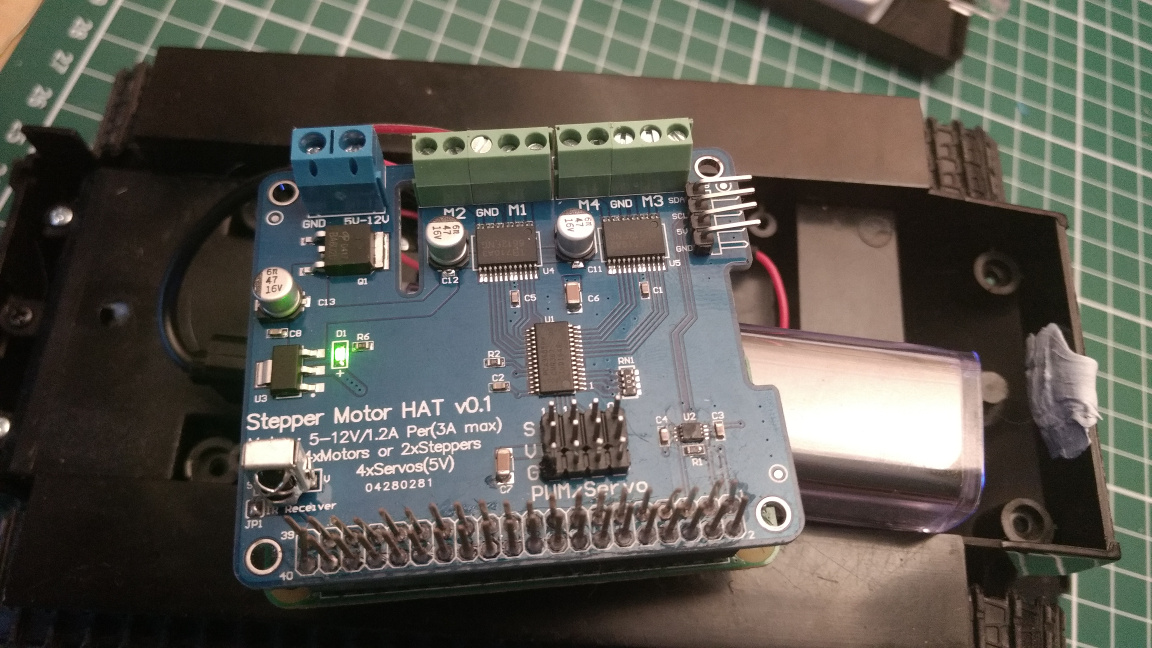
The motor supply is wired in separately to the HAT, and the board
keeps this isolated from the Pi supply/GPIO. The + lead is wired in through the switch as already described.
Next the motors are wired into the terminals, using the outer terminals for each motor. The left motor goes on M1 and the
right on M2. Getting the wires the right way around (so forward=forward) is a case of trial an error, try one then reverse it if it's wrong.
Once that's wired up, you can pop the MotorHAT on top of the Pi. Make sure it goes the right way around — the MotorHAT should be over the Pi board, on the top side.
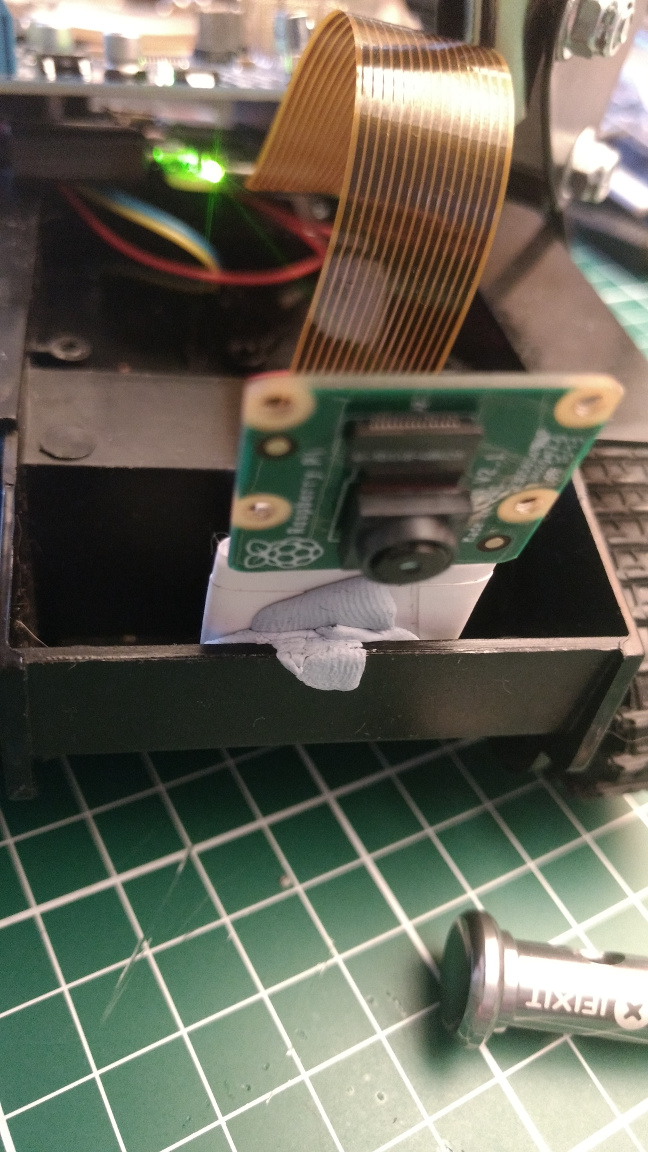
Pi Camera
The Pi Camera unit attaches into the camera port on the Pi using the cable. If using a Pi Zero you need a specific connector for the camera which is narrower at the Pi end. Make sure the plastic widget is on the port to hold the cable, line the cable up metal up and push it in.
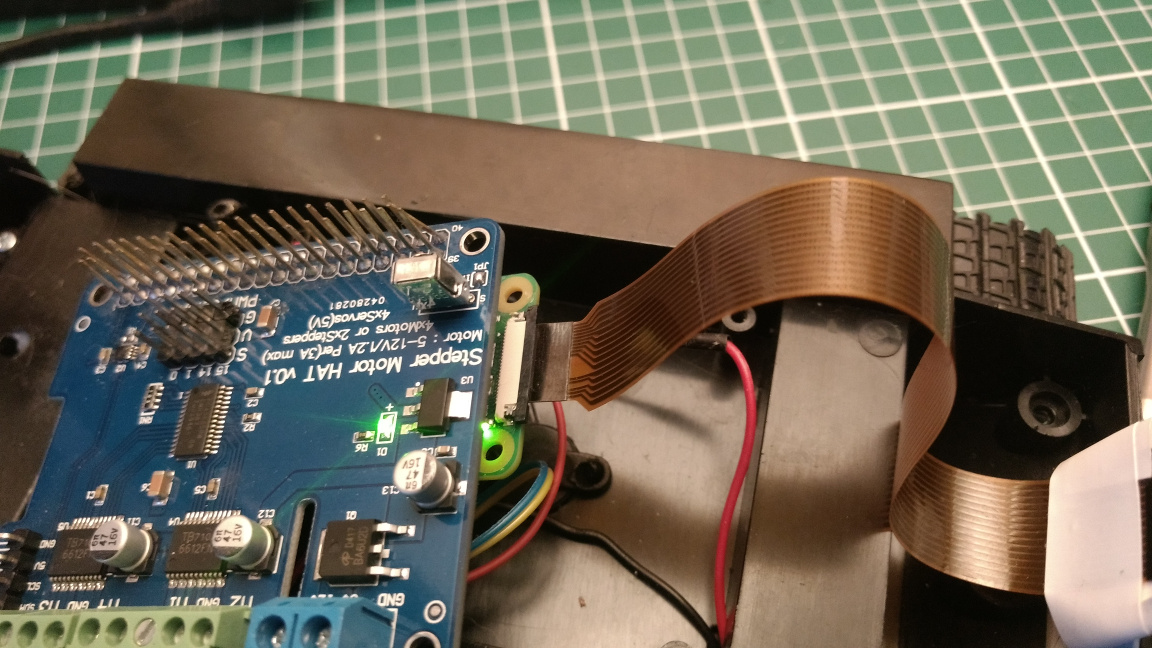
The camera assembly isn't fancy, it's just tacked to the edge of the base with some card and tape.
Once that's one you can power up the Pi with a powerbank. I recommend using a normal lipstick-style mobile powerbank as they're cheap, easy to charge and will easily run a Pi Zero W for a few hours. If you want longer runtime or a permanent installation you could also look into 18650 battery cells with a charging board.
The code
The robot control code is split into 3 parts —
- The robot control code, that handles the inputs, moves the robot and streams the camera
- The server which receives inputs from the (multiple) clients and forwards them to the robot in batches, and receives the single camera images from the robot and broadcasts them to the clients.
- The client code which sends user inputs to the server, and renders the images being sent in return.
The server isn't strictly necessary in this setup — the Pi itself could happily run a webserver to serve the client interface, and then directly interface with clients via websockets. However, that would require the robot to be accessible on the internet and streaming the camera images to multiple clients would add quite a bit of overhead. Since we're hoping to support a largish number (>25) of simultaneous clients it's preferable to offload that work somewhere other than the Pi. The downside is that this two-hop approach adds some control/refresh delay and makes things slightly less reliable (more later).
The full source is available on Github.
The client app.js
The browser part, which provides the the user-interface for control and a display for streaming images from the robot, was implemented in AngularJS to keep things simple. Just the controller code is shown below.
:::js
var robotApp = angular.module('robotApp', []);
robotApp.controller('RobotController', function ($scope, $http, $interval, socket) {

    var uuidv4 = function () {
        return 'xxxxxxxx-xxxx-4xxx-yxxx-xxxxxxxxxxxx'.replace(/[xy]/g, function(c) {
            var r = Math.random() * 16 | 0, v = c == 'x' ? r : (r & 0x3 | 0x8);
            return v.toString(16);
        });
    }

    $scope.directions = [4,5,6,7,8,1,2,3];
    $scope.uuid = uuidv4();
    $scope.data = {
        selected: null,
        direction: null,
        magnitude: 0,
        n_controllers: 0,
        total_counts: {}
    }
    $scope.min = window.Math.min;

    socket.emit('client_ready');

    $scope.set_direction = function(i) {
        $scope.data.selected = i;
        $scope.send_instruction()
    }

    $scope.send_instruction = function() {
        socket.emit('instruction', {
            user: $scope.uuid,
            direction: $scope.data.selected,
        })
    }

    // Instruction timeout is 3 second, ping to ensure we stay live
    setInterval($scope.send_instruction, 1500);
The main data receive block accepts all data from the server and assigns it onto the $scope to update the interface. Image data from the camera is sent as raw bytes, so to get it into an img element we
need to convert it to base64encoded URL. This would be more efficient to do on the robot/server (avoid every client having to perform this operation) but base64 encoding increases the size of the data transmitted by about 1/3.
:::js
        // Receive updated signal via socket and apply data
        socket.on('updated_status', function (data) {
            $scope.data.direction = data.direction;
            $scope.data.magnitude = data.magnitude;
            $scope.data.n_controllers = data.n_controllers
            $scope.data.total_counts = data.total_counts;
          });

        // Receive updated signal via socket and apply data
        socket.on('updated_image', function (data) {
            blob = new Blob([data], {type: "image/jpeg"});
            $scope.data.imageUrl = window.URL.createObjectURL(blob);
          });

 });
Finally, we define a set of wrappers to integrate sockets in our AngularJS application. This ensures that changes to the scope that are triggered by websocket events are detected — and the view updated.
:::js
robotApp.factory('socket', function ($rootScope) {
  var socket = io.connect();
  return {
    on: function (eventName, callback) {
      socket.on(eventName, function () {
        var args = arguments;
        $rootScope.$apply(function () {
          callback.apply(socket, args);
        });
      });
    },
    emit: function (eventName, data, callback) {
      socket.emit(eventName, data, function () {
        var args = arguments;
        $rootScope.$apply(function () {
          if (callback) {
            callback.apply(socket, args);
          }
        });
      })
    }
  };
});
The server app.py
Note the (optional) use of ROBOT_WS_SECRET to change the endpoints used for communicating with the robot. This is a simple way to prevent a client connecting, pretending it's the robot, and broadcasting naughty images to everyone. If you set this value, just make sure you set it to the same thing on both the robot and server (via the environment variable) or they won't be able to talk to one another.
import os
import time

from flask import Flask
from flask_socketio import SocketIO, join_room

app = Flask(__name__)
app.config.from_object(os.environ.get('APP_SETTINGS', 'config.Config'))
app.config['SQLALCHEMY_TRACK_MODIFICATIONS'] = False
app.secret_key = app.config['SECRET_KEY']
socketio = SocketIO(app)

# Use a secret WS endpoint for robot.
robot_ws_secret = app.config['ROBOT_WS_SECRET']

# Buffer incoming instructions and emit direct to the robot.
# on each image cycle.
instruction_buffer = {}
latest_robot_state = {}

INSTRUCTION_DURATION = 3


@app.route('/')
def index():
    """
    Return template for survey view, data (form) loaded by JSON
    :return: raw index.html response
    """
    return app.send_static_file('index.html')
To stop dead clients from continuing to control the robot, we need to expire instructions after INSTRUCTION_DURATION seconds have elapsed.
def clear_expired_instructions():
    """
    Remove all expired instructions from the buffer.

    Instructions are expired if their age > INSTRUCTION_DURATION. This needs to be low
    enough that the robot stops performing a behaviour when a client leaves, but
    high enough that an active client's instructions are not cleared due to lag.
    """
    global instruction_buffer
    threshold = time.time() - INSTRUCTION_DURATION
    instruction_buffer = {k: v for k, v in instruction_buffer.items() if v['timestamp'] > threshold}
All communication between the server, the clients and robot is handled through websockets. We assigned clients to a specific socketIO "room" so we can communicate with them in bulk, without also sending the same data to the robot.
@socketio.on('client_ready')
def client_ready_join_room(message):
    """
    Receive the ready instruction from (browser) clients and assign them to the client room.
    """
    join_room('clients')
User instructions are received regularly from clients (timed-ping) with a unique user ID being used to ensure only one instruction is stored per client. Instructions are timestamped as they arrive, so they can be expired later.
@socketio.on('instruction')
def user_instruction(message):
    """
    Receive and buffer direction instruction from client.
    :return:
    """

    # Perform validation on inputs, direction must be in range 1-9 or None. Anything else
    # is interpreted as None (=STOP) from that client.
    message['direction'] = message['direction'] if message['direction'] in range(1, 9) else None

    instruction_buffer[message['user']] = {
        'direction': message['direction'],
        'timestamp': int(time.time())
    }
The robot camera stream and instruction/status loop run separately, and connect to different sockets. Updates to status are forwarded onto the clients and responded to with the latest instruction buffer. The camera image is forwarded onwards with no response.
@socketio.on('robot_update_' + robot_ws_secret)
def robot_update(message):
    """
    Receive the robot's current status message (dict) and store for future
    forwarding to clients. Respond with the current instruction buffer directions.
    :param message: dict of robot status
    :return: list of directions (all clients)
    """
    # Forward latest state to clients.
    socketio.emit('updated_status', message, json=True, room='clients')
    # Clear expired instructions and return the remainder to the robot.
    clear_expired_instructions()
    return [v['direction'] for v in instruction_buffer.values()]


@socketio.on('robot_image_' + robot_ws_secret)
def robot_image(data):
    """
    Receive latest image data and broadcast to clients
    :param data:
    """
    # Forward latest camera image
    socketio.emit('updated_image', data, room='clients')


if __name__ == '__main__':
    socketio.run(app)
The robot robot.py
The robot is implemented in Python 3 and runs locally on the Pi (see later for instructions to run automatically at startup).
import atexit
from collections import Counter
from concurrent import futures
from io import BytesIO
import math, cmath
import os
import time

from Adafruit_MotorHAT import Adafruit_MotorHAT, Adafruit_DCMotor
from picamera import PiCamera
from socketIO_client import SocketIO
The following constants can be used to configure the behaviour of the robot, but the values below were found to be produce a stable and reasonably responsive bot.
SPEED_MULTIPLIER = 200
UPDATES_PER_SECOND = 5
CAMERA_QUALITY = 10
CAMERA_FPS = 5

# A store of incoming instructions from clients, stored as list of client directions
instructions = []

# Use a secret WS endpoint for robot.
robot_ws_secret = os.getenv('ROBOT_WS_SECRET', '')`
The robot uses 8 direction values for the compass points and
intermediate directions. The exact behaviour of these directions
are defined in the DIRECTIONS dictionary, as a tuple of direction
and magnitudes for the two motors.
# Conversion from numeric inputs to motor instructions + multipliers. The multipliers
# are adjusted for each direction, e.g. forward is full-speed, turn is half.
DIRECTIONS = {
    1: ((Adafruit_MotorHAT.FORWARD, 0.75), (Adafruit_MotorHAT.FORWARD, 0.5)),
    2: ((Adafruit_MotorHAT.FORWARD, 0.5), (Adafruit_MotorHAT.BACKWARD, 0.5)),
    3: ((Adafruit_MotorHAT.BACKWARD, 0.75), (Adafruit_MotorHAT.BACKWARD, 0.5)),
    4: ((Adafruit_MotorHAT.BACKWARD, 1), (Adafruit_MotorHAT.BACKWARD, 1)),
    5: ((Adafruit_MotorHAT.BACKWARD, 0.5), (Adafruit_MotorHAT.BACKWARD, 0.75)),
    6: ((Adafruit_MotorHAT.BACKWARD, 0.5), (Adafruit_MotorHAT.FORWARD, 0.5)),
    7: ((Adafruit_MotorHAT.FORWARD, 0.5), (Adafruit_MotorHAT.FORWARD, 0.75)),
    8: ((Adafruit_MotorHAT.FORWARD, 1.5), (Adafruit_MotorHAT.FORWARD, 1.5)),
}

# Initialize motors, and define left and right controllers.
motor_hat = Adafruit_MotorHAT(addr=0x6f)
left_motor = motor_hat.getMotor(1)
right_motor = motor_hat.getMotor(2)


def turnOffMotors():
    """
    Shutdown motors and unset handlers.
    Called on exit to ensure the robot is stopped.
    """
    left_motor.run(Adafruit_MotorHAT.RELEASE)
    right_motor.run(Adafruit_MotorHAT.RELEASE)
The average of all client's input direction angles are combined using complex math to convert the angles into vectors, sum them and calculate back the angle of the resulting single point. You could also do this using the sum of sines and cosines.
def average_radians(list_of_radians):
    """
    Return average of a list of angles, in radians, and it's amplitude.

    We calculate a set of vectors for each angle, using a fixed distance.
    Add up the sum of the x, y of the resulting vectors.
    Work back to an angle + get a magnitude.

    :param list_of_radians:
    :return:
    """
    vectors = [cmath.rect(1, angle) if angle is not None else cmath.rect(0, 0)
                # length 1 for each vector; or 0,0 for null (stopped)
                for angle in list_of_radians]

    vector_sum = sum(vectors)
    return cmath.phase(vector_sum), abs(vector_sum)


def to_radians(d):
    """
    Convert 7-degrees values to radians.
    :param d:
    :return: direction in radians
    """
    return d * math.pi / 4 if d is not None else None


def to_degree7(r):
    """
    Convert radians to 'degrees' with a 0-7 scale.
    :param r:
    :return: direction in 7-value degrees
    """
    return round(r * 4 / math.pi)


def map1to8(v):
    """
    Limit v to the range 1-8 or None, with 0 being converted to 8 (straight ahead).

    This is necessary because the back-calculation to degree7 will negative values
    yet the input to calculate_average_instruction must use 1-8 to weight forward
    instructions correctly.
    :param v:
    :return: v, in the range 1-8 or None
    """
    if v is None or v > 0:
        return v
    return v + 8  # if 0, return 8
We iterate over all the client instructions, calculate an average angle and magnitude, and count totals for each direction (to be sent back to the clients).
def calculate_average_instruction():
    """
    Return a dictionary of counts for each direction option in the current
    instructions and the direction with the maximum count.

    Directions are stored in numeric range 0-7, we first convert these imaginary
    degrees to radians, then calculate the average radians by adding vectors.
    Once we have that value in radians we can convert back to our own scale
    which the robot understands. The amplitude value gives us a speed.

    0 = Forward
    7/1 = Forward left/right (slight)
    6/2 = Turn left right (stationary)
    5/3 = Backwards left/right (slight)
    4 = Backwards

    :return: dict total_counts, direction
    """

    # If instructions remaining, calculate the average.
    if instructions:
        directions_v, direction_rads = zip(*[(d, to_radians(d)) for d in instructions])
        total_counts = Counter([map1to8(v) for v in directions_v])

        rad, magnitude = average_radians(direction_rads)

        if magnitude < 0.05:
            magnitude = 0
            direction = None

        return {
            'total_counts': total_counts,
            'direction': map1to8(to_degree7(rad)),
            'magnitude': magnitude
        }

    else:
        return {
            'total_counts': {},
            'direction': None,
            'magnitude': 0
        }
The average control data is converted to motor instructions using the
DIRECTIONS dictionary defined earlier. Because of the way that multiple client instructions are combined and then multiplied motor speeds can end up > 255, so we additionally need to cap these.
def control_robot(control):
    """
    Takes current robot control instructions and apply to the motors.
    If direction is None, all-stop, otherwise calculates a speed
    for each motor using a combination of DIRECTIONS, magnitude
    and SPEED_MULTIPLIER, capped at 255.
    :param control:
    """
    if control['direction'] is None:
        # All stop.
        left_motor.setSpeed(0)
        right_motor.setSpeed(0)
        return

    direction = int(control['direction'])
    left, right = DIRECTIONS[direction]
    magnitude = control['magnitude']

    left_motor.run(left[0])
    left_speed = int(left[1] * magnitude * SPEED_MULTIPLIER)
    left_speed = min(left_speed, 255)
    left_motor.setSpeed(left_speed)

    right_motor.run(right[0])
    right_speed = int(right[1] * magnitude * SPEED_MULTIPLIER)
    right_speed = min(right_speed, 255)
    right_motor.setSpeed(right_speed)
We collect incoming messages and store them in the instruction list. This is emptied out on each loop before the callback should hit this function — we delete it in the main loop in case the callback fails.
def on_new_instruction(message):
    """
    Handler for incoming instructions from clients. Instructions are received, combined
    and expired on the server, so only active instructions (on per client) are received
    here.
    :param message: dict of all current instructions from all clients.
    :return:
    """
    instructions.extend(message)
Streaming the images from robots is heavy work, so we spin it off into it's own process — and using a separate websocket to the server. The worker intializes the camera, opens a socket to the server and then
iterates over the Pi camera capture_continuous iterator — a never-ending generator of images. Image data is emitted in raw bytes.
def streaming_worker():
    """
    A self-container worker for streaming the Pi camera over websockets to the server
    as JPEG images. Initializes the camera, opens the websocket then enters a continuous
    capture loop, with each snap transmitted.
    :return:
    """
    camera = PiCamera()
    camera.resolution = (200, 300)
    camera.framerate = CAMERA_FPS

    with BytesIO() as stream, SocketIO('https://kropbot.herokuapp.com', 443) as socketIO:
        # capture_continuous is an endless iterator. Using video port + low quality for speed.
        for _ in camera.capture_continuous(stream, format='jpeg', use_video_port=True, quality=CAMERA_QUALITY):
            stream.truncate()
            stream.seek(0)
            data = stream.read()
            socketIO.emit('robot_image_' + robot_ws_secret, bytearray(data))
            stream.seek(0)
The main loop controls the sending of robot status updates to the server, and receiving of client instructions in return. The loop is throttled to UPDATES_PER_SECOND by setting wait locks at the end
of each iteration. This is required to stop flooding the server with useless packets of data.
if __name__ == "__main__":
    # Register our function to disable motors when we shutdown.
    atexit.register(turnOffMotors)
    with futures.ProcessPoolExecutor() as executor:
        # Execute our camera streamer 'streaming_worker' in a separate process.
        # This runs continuously until exit.
        future = executor.submit(streaming_worker)

        with SocketIO('https://kropbot.herokuapp.com', 443) as socketIO:
            while True:
                current_time = time.time()
                lock_time = current_time + 1.0 / UPDATES_PER_SECOND
                # Calculate current average instruction based on inputs,
                # then perform the action.
                instruction = calculate_average_instruction()
                control_robot(instruction)
                instruction['n_controllers'] = len(instructions)
                # on_new_instruction is a callback to handle the server's response.
                socketIO.emit('robot_update_' + robot_ws_secret, instruction, on_new_instruction)
                # Empty all current instructions before accepting any new ones,
                # ensuring that if we lose contact with the server we stop.
                del instructions[:]
                socketIO.wait_for_callbacks(5)

                # Throttle the updates sent out to UPDATES_PER_SECOND (very roughly).
                time.sleep(max(0, lock_time - time.time()))

To support developers in [[ countryRegion ]] I give a [[ localizedDiscount[couponCode] ]]% discount on all books and courses.
[[ activeDiscount.description ]] I'm giving a [[ activeDiscount.discount ]]% discount on all books and courses.
Starting up
Server
The code repository contains the files needed to get this set up on a Heroku host. First we need to create the app on Heroku, and add this repository as a remote for our git repo.
heroku create <app-name>
heroku heroku git:remote -a <app-name>
The app name will be the subdomain your app is hosted under https://<app-name>.herokuapp.com. To push the code up and start the application you can now use:
git push heroku remote
Note that if you are going to set a ROBOT_WS_SECRET on your robot (optional, but recommended) you will need to set this on Heroku too. Random letters and numbers are fine.
heroku config:set ROBOT_WS_SECRET =<your-ws-secret>
Robot
Copy the robot code over to your Pi, e.g. using scp
scp robot.py pi@raspberrypi.local:/home/pi
You can then SSH in with ssh pi@raspberrypi.local. First install the PiCamera and then MotorHAT libraries from Adafruit (these work for the non-official boards too).
git clone https://github.com/adafruit/Adafruit-Motor-HAT-Python Library.git
cd Adafruit-Motor-HAT-Python-Library
sudo apt-get install python3-dev python3-picamera
sudo python3 setup.py install
You can then install the remaining Python dependencies with pip, e.g.
sudo pip3 install git+https://github.com/wwqgtxx/socketIO-client.git
We are using a non-standard version of SocketIO_client in order to get support for binary data streaming. Otherwise we would need to base64encode it on the robot, increasing the size of the message by 1/3.
Finally, we need to enable the camera on the Pi. To do this open up the Raspberry Pi configuration manager and enable the camera interface.
raspi-config
Once the camera is enabled (you may need to restart), you can start the robot with:
python3 robot.py
The simplest way to get the robot starting on each boot is to use cron. Edit your cron tab using crontab -e and add a line line the following, replacing your ROBOT_WS_SECRET value:
@reboot ROBOT_WS_SECRET=<your_ws_value> python3 /home/pi/robot.py
Save the file and exit back to the command line. If you run sudo reboot your Pi will restart, and the robot controller will start up automatically. Open your browser to your hosted Heroku app and as soon as the robot is live the camera stream should begin.
Notes
The configuration of the robot (fps/instructions per second) has been chosen to give decent responsiveness while not overloading the Heroku server. If you're running on a beefier host you can probably increase these values a bit.
Streaming JPEG images is very inefficient (since each frame is encoded independently, a static stream still uses data). Using an actual video format e.g. h264 to stream would allow a huge improvement in quality with the same data rate. However, this does complicate the client (and robot) a bit, since we need to be able to send the initial stream spec data to each new client + need a raw h264 stream decoder on the client. Something for a rainy day.